Private Model Upload
Uploading Private Models to Cube AI
This guide explains how to upload and deploy private or custom models into a Cube AI Confidential VM (CVM). Private models are models that are not available in public registries (Ollama library, HuggingFace) — for example, fine-tuned models, proprietary weights, or models with restricted access.
Port Reference
CVM network access uses QEMU user-mode port forwarding. The following host-to-guest port mappings are configured in the QEMU launch scripts (hal/buildroot/qemu.sh and hal/ubuntu/qemu.sh):
| Host Port | Guest Port | Service |
|---|---|---|
| 6190 | 22 | SSH |
| 6193 | 7001 | Cube Agent API |
Inside the CVM, the LLM backends listen on their own ports (not directly exposed to the host):
| Port | Service |
|---|---|
| 11434 | Ollama API |
| 8000 | vLLM OpenAI-compatible API |
The Cube Agent (port 7001 inside the CVM, 6193 on the host) acts as a reverse proxy to whichever LLM backend is configured, so all model inference requests go through the agent.
Build-Time Model Embedding (Buildroot HAL)
The Buildroot HAL supports embedding custom model configuration directly into the CVM image via menuconfig. This is the recommended approach for production deployments where models should be available immediately after boot.
Ollama
Using menuconfig
During HAL image configuration (see HAL guide), navigate to:
Path: Target packages → Cube packages → ollama
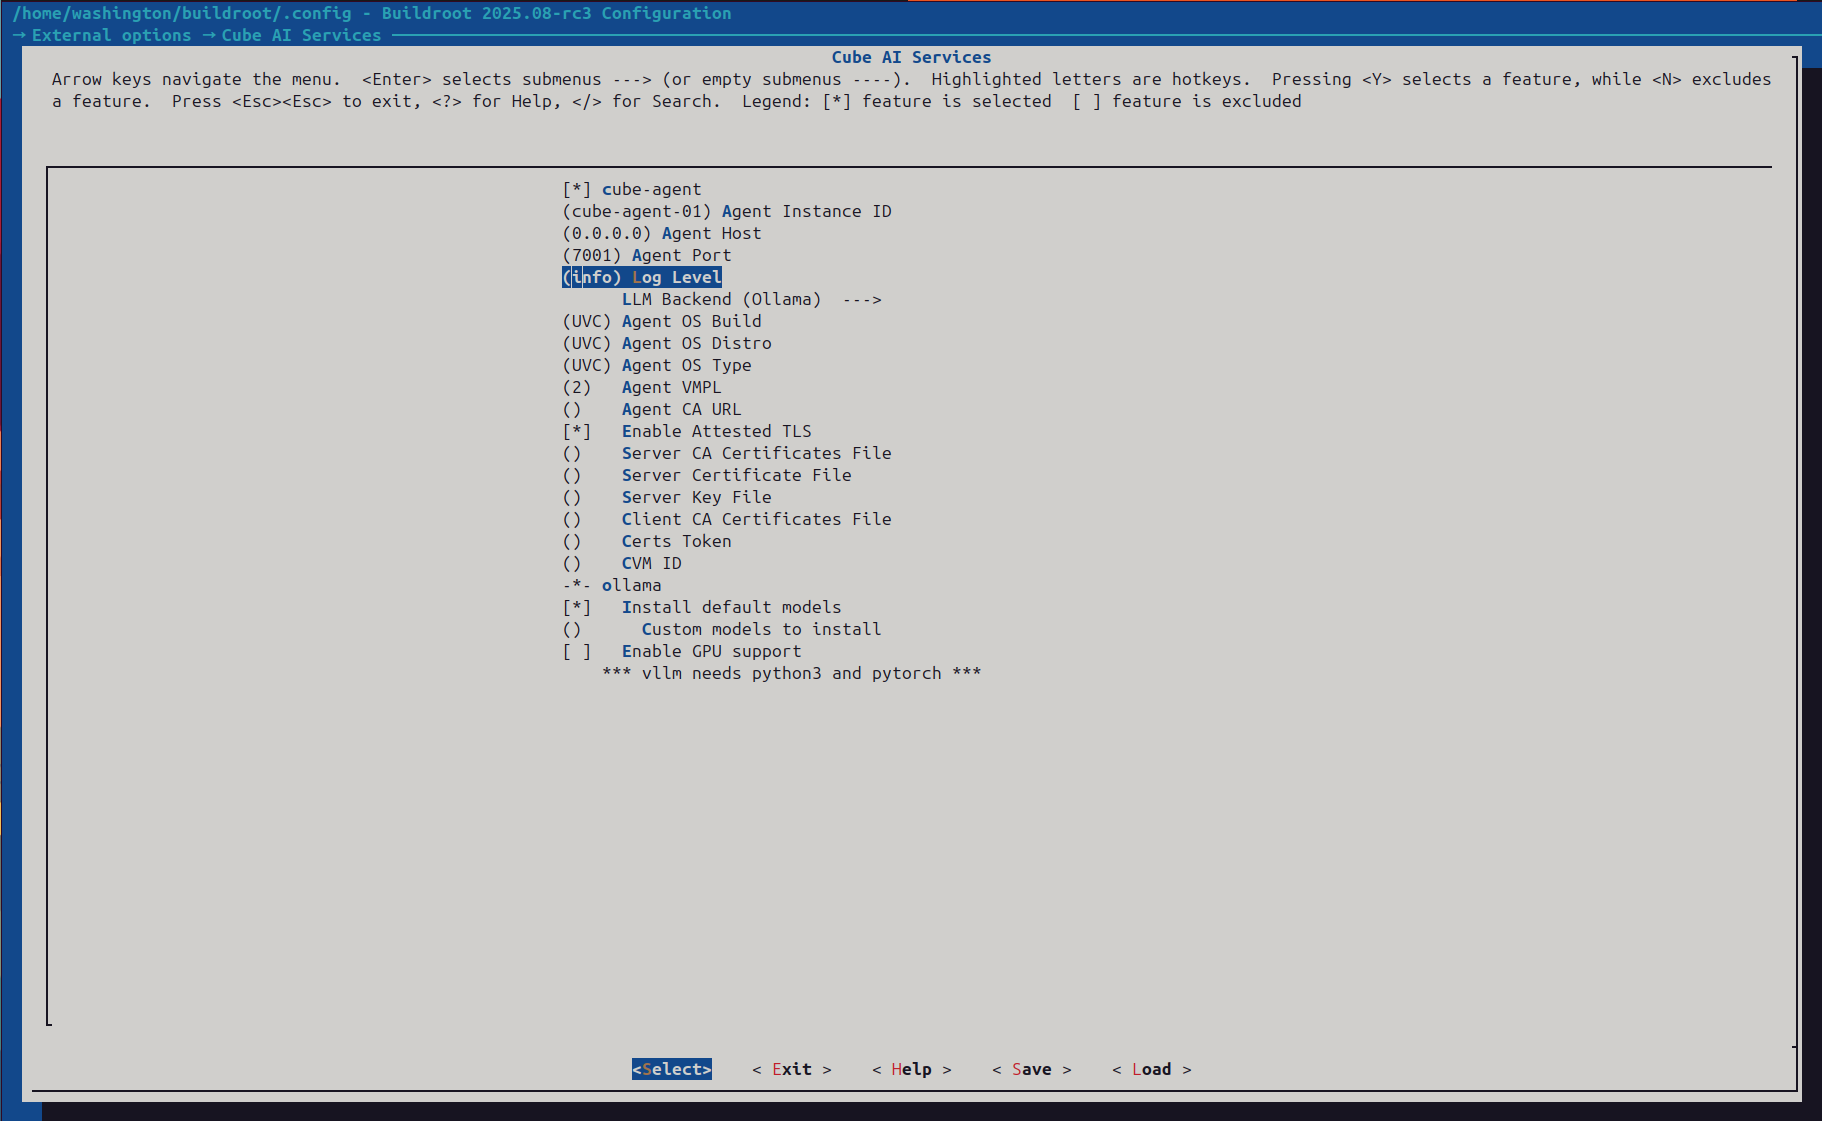 Cube AI Services menu in Buildroot menuconfig showing the Ollama section and available configuration options
Set the Custom models to install field with a space-separated list of Ollama model tags:
llama2:7b mistral:7b codellama:13b Entering model tags in the Custom models to install input dialog
These models are pulled automatically on first boot by a script installed at /usr/libexec/ollama/pull-models.sh.
Or set it directly in the Buildroot defconfig:
BR2_PACKAGE_OLLAMA_CUSTOM_MODELS="llama2:7b mistral:7b codellama:13b"Then rebuild:
make -j$(nproc)Embedding GGUF Weights in the Image
For models not available in the Ollama registry (e.g., your own fine-tuned GGUF weights), use the Buildroot filesystem overlay to embed the files directly:
- Place the model weights in the overlay:
mkdir -p cube/hal/buildroot/linux/board/cube/overlay/var/lib/ollama/custom-models/
cp /path/to/weights.gguf cube/hal/buildroot/linux/board/cube/overlay/var/lib/ollama/custom-models/- Add a Modelfile to the overlay:
mkdir -p cube/hal/buildroot/linux/board/cube/overlay/etc/cube/modelfiles/
cat > cube/hal/buildroot/linux/board/cube/overlay/etc/cube/modelfiles/my-model.Modelfile << 'EOF'
FROM /var/lib/ollama/custom-models/weights.gguf
PARAMETER temperature 0.7
SYSTEM "You are a domain-specific assistant."
EOF- Add a startup script in the overlay to register the model after Ollama starts:
mkdir -p cube/hal/buildroot/linux/board/cube/overlay/usr/libexec/ollama/
cat > cube/hal/buildroot/linux/board/cube/overlay/usr/libexec/ollama/register-custom-models.sh << 'SCRIPT'
#!/bin/sh
# Wait for Ollama to be ready
for i in $(seq 1 30); do
  if curl -s http://localhost:11434/api/version > /dev/null 2>&1; then
    break
  fi
  sleep 2
done

# Register custom models from Modelfiles
for mf in /etc/cube/modelfiles/*.Modelfile; do
  [ -f "$mf" ] || continue
  name=$(basename "$mf" .Modelfile)
  ollama create "$name" -f "$mf"
done
SCRIPT
chmod +x cube/hal/buildroot/linux/board/cube/overlay/usr/libexec/ollama/register-custom-models.sh- Hook the registration script into boot so it runs automatically after Ollama comes up:
For the default Buildroot SysV init flow:
mkdir -p cube/hal/buildroot/linux/board/cube/overlay/etc/init.d/
cat > cube/hal/buildroot/linux/board/cube/overlay/etc/init.d/S97ollama-custom-models << 'SCRIPT'
#!/bin/sh

case "$1" in
  start)
    /usr/libexec/ollama/register-custom-models.sh &
    ;;
esac
SCRIPT
chmod +x cube/hal/buildroot/linux/board/cube/overlay/etc/init.d/S97ollama-custom-models
For systemd-based images, add a drop-in instead:
mkdir -p cube/hal/buildroot/linux/board/cube/overlay/usr/lib/systemd/system/ollama.service.d/
cat > cube/hal/buildroot/linux/board/cube/overlay/usr/lib/systemd/system/ollama.service.d/register-custom-models.conf << 'EOF'
[Service]
ExecStartPost=/usr/libexec/ollama/register-custom-models.sh
EOF
This ensures the registration script runs automatically after the main Ollama service starts.
- Build the image:
cd buildroot
make -j$(nproc)
vLLM
Using menuconfig
Navigate to Target packages → Cube packages → vllm and set:
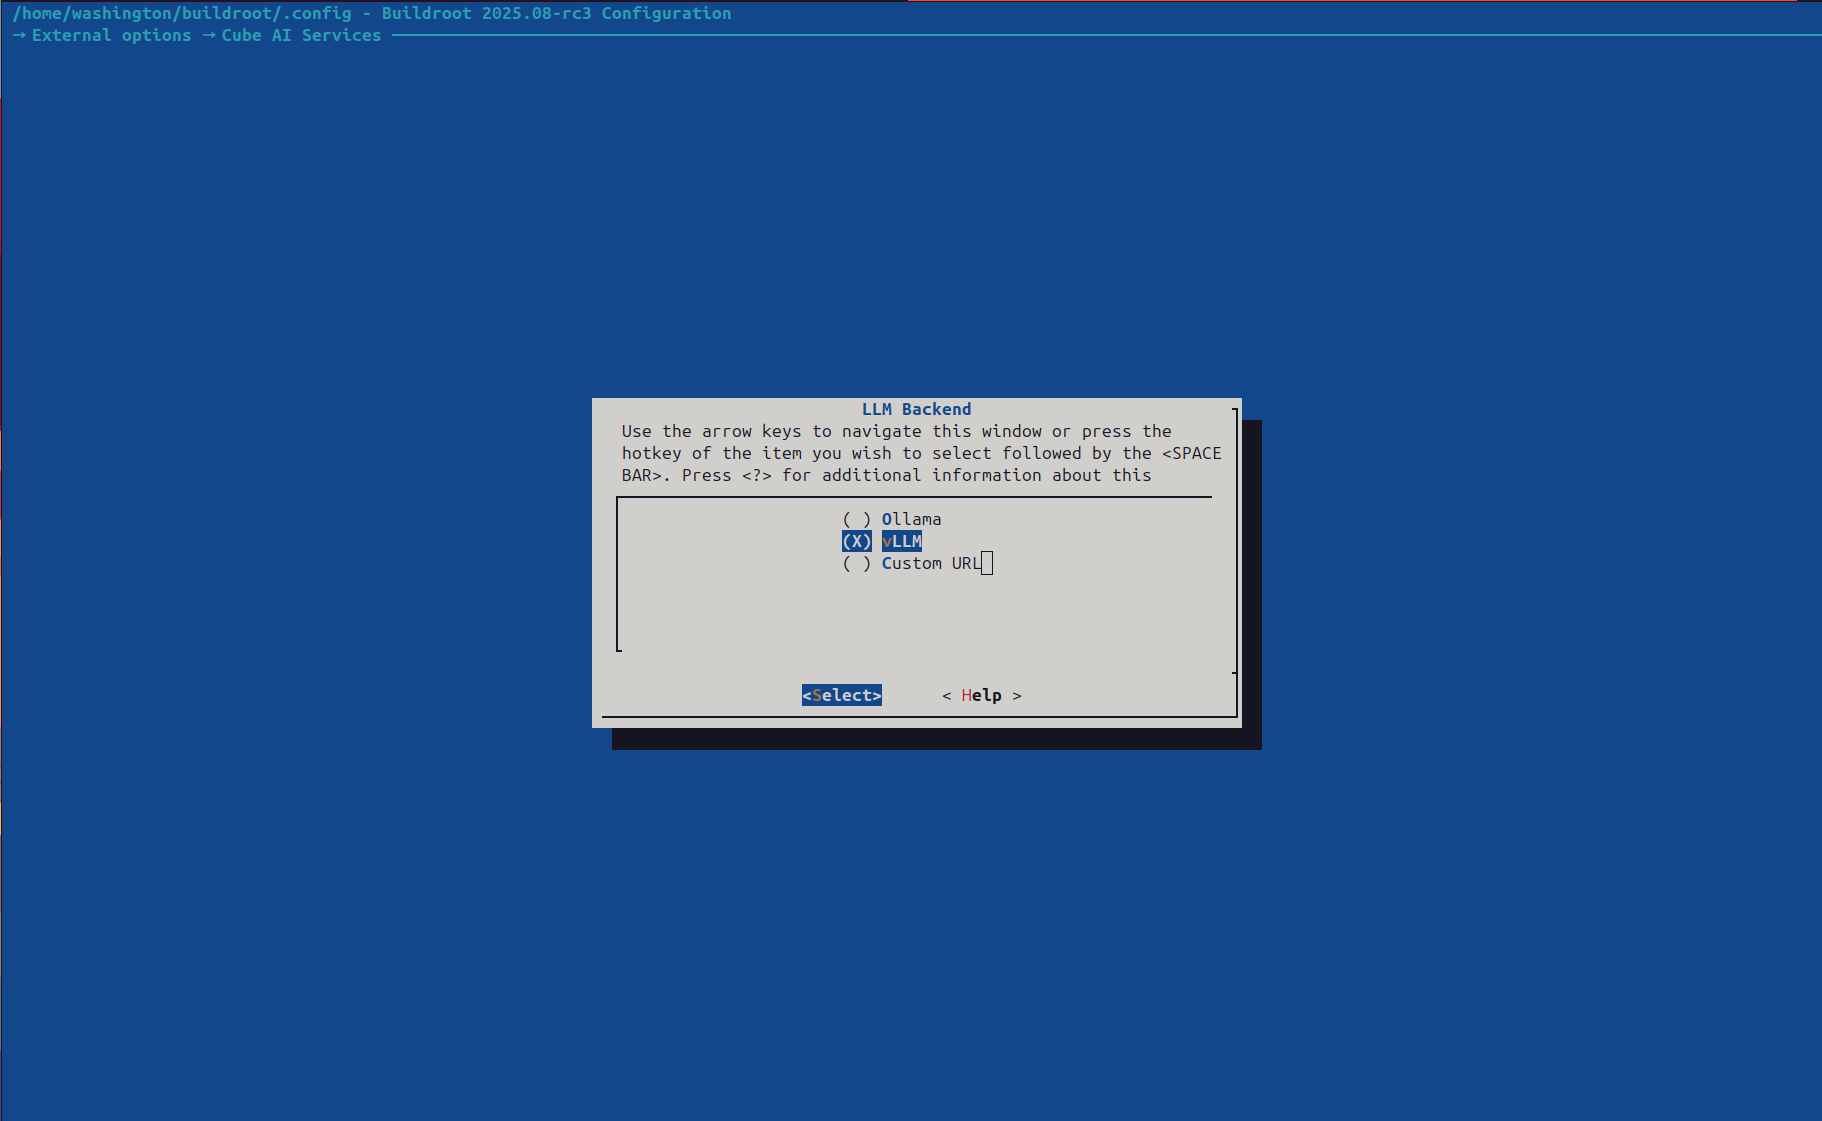 LLM Backend selection dialog — choose between Ollama, vLLM, or a Custom URL endpoint
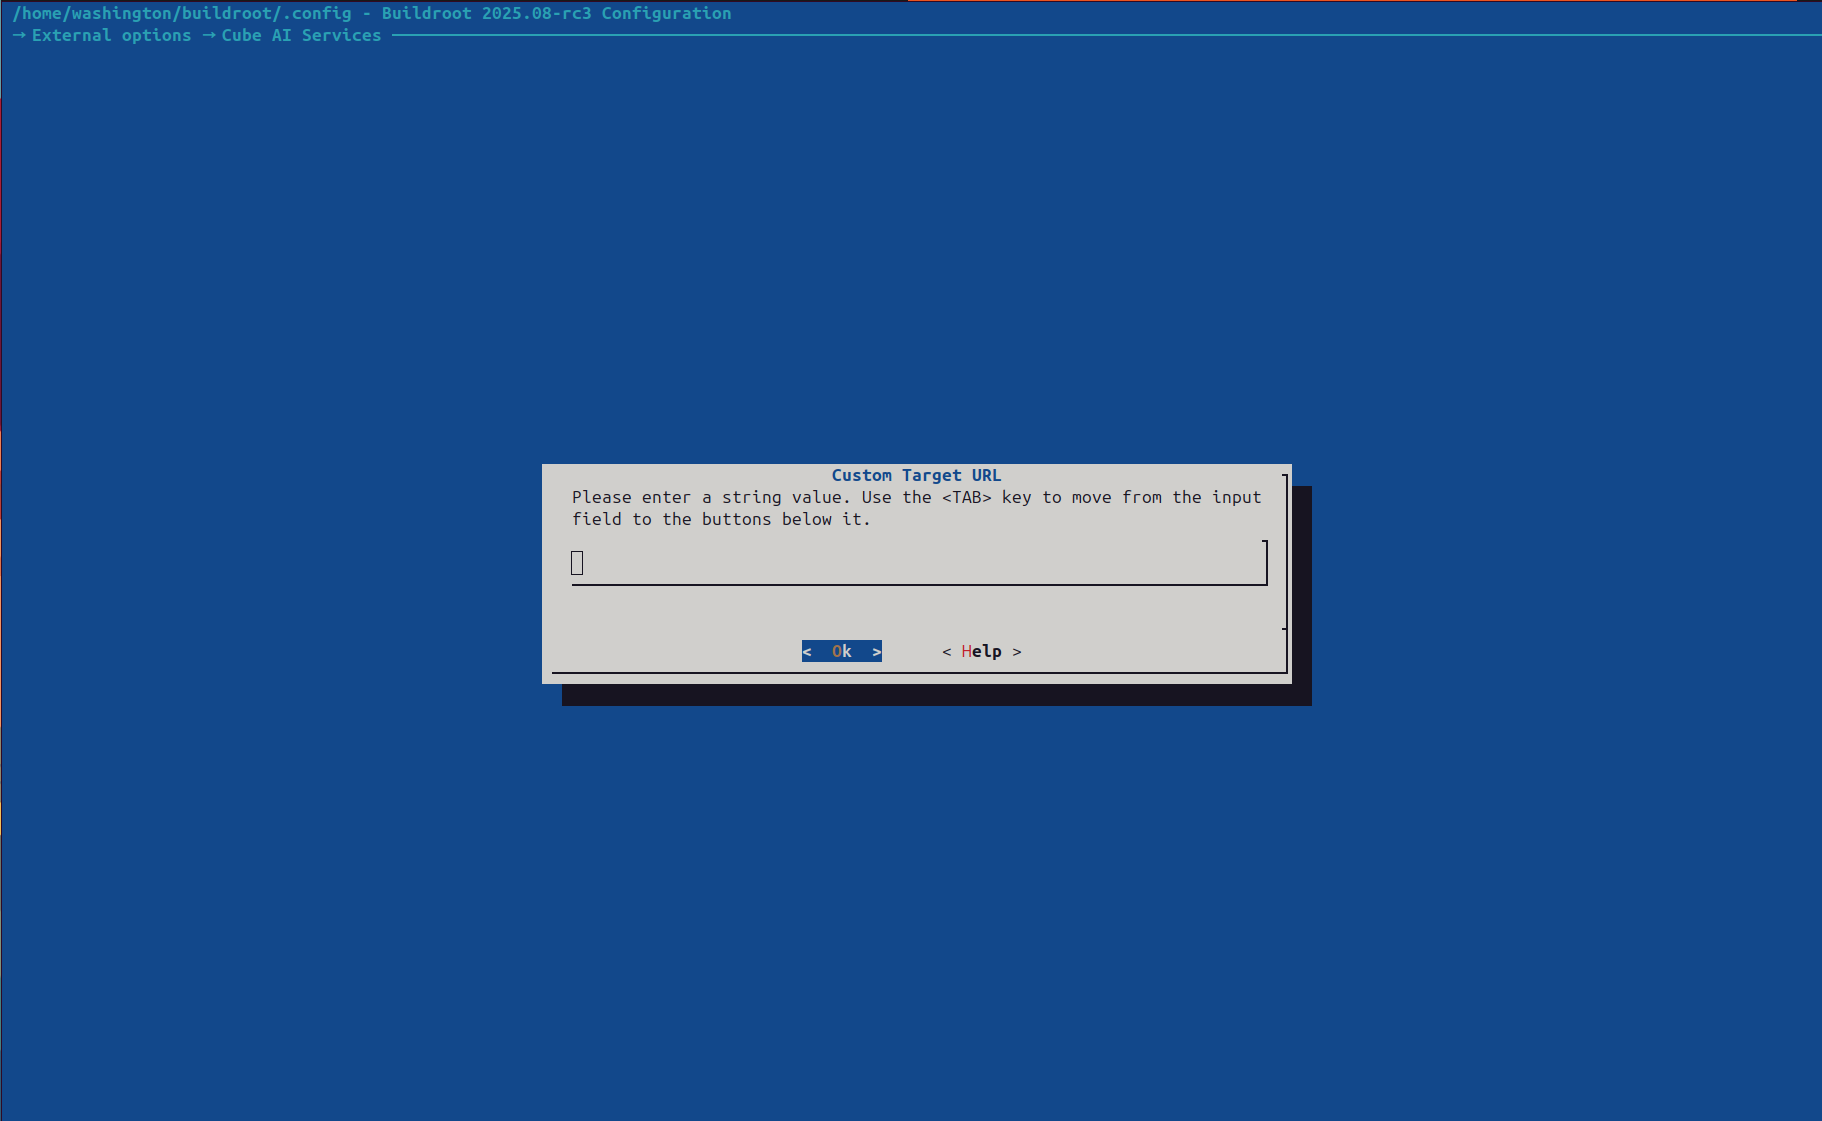 Custom Target URL dialog for pointing the Cube Agent at an external LLM backend
- Custom model path — Absolute path to a HuggingFace-format model directory on your build machine
Or in the defconfig:
BR2_PACKAGE_VLLM_CUSTOM_MODEL_PATH="/path/to/my-hf-model"The build system copies the model files into /var/lib/vllm/models/ in the image and configures vLLM to serve from that local path automatically. The vLLM service configuration is written to /etc/vllm/vllm.env.
You can also configure inference parameters at build time:
BR2_PACKAGE_VLLM_MODEL="meta-llama/Llama-2-7b-hf"
BR2_PACKAGE_VLLM_GPU_MEMORY="0.90"
BR2_PACKAGE_VLLM_MAX_MODEL_LEN="2048"
BR2_PACKAGE_VLLM_GPU_MEMORY is the Buildroot config symbol. During image creation it is written into /etc/vllm/vllm.env as VLLM_GPU_MEMORY_UTILIZATION, which is the runtime variable consumed by the vLLM service.
Then rebuild:
make -j$(nproc)Cloud-Init Model Provisioning (Ubuntu)
For Ubuntu-based CVMs using cloud-init, custom models are configured in the user-data section of hal/ubuntu/qemu.sh. Models are provisioned during the first boot.
Ollama
Add a Modelfile and registration commands to the write_files and runcmd sections of the cloud-init user-data:
write_files:
  - path: /etc/cube/modelfiles/my-model.Modelfile
    content: |
      FROM /var/lib/ollama/custom-models/weights.gguf
      PARAMETER temperature 0.7
      SYSTEM "You are a domain-specific assistant."
    permissions: '0644'

runcmd:
  # ... (existing commands that install ollama and start it)
  # Download private model weights from an internal server
  - mkdir -p /var/lib/ollama/custom-models
  - curl -o /var/lib/ollama/custom-models/weights.gguf https://internal-server/models/weights.gguf
  # Wait for Ollama and register the custom model
  - |
    for i in $(seq 1 60); do
      if curl -s http://localhost:11434/api/version > /dev/null 2>&1; then
        break
      fi
      sleep 2
    done
    ollama create my-model -f /etc/cube/modelfiles/my-model.Modelfile
vLLM
Add a model download and vLLM configuration step to runcmd:
runcmd:
  - pip install vllm
  - mkdir -p /var/lib/vllm/models
  # Download from a private HuggingFace registry (requires token for gated models)
  - |
    # Placeholder only. Do not commit real tokens into qemu.sh.
    # In production, inject HF_TOKEN via environment variables or a secret manager.
    HF_TOKEN="${HF_TOKEN:-your-token-here}"
    huggingface-cli download my-org/my-private-model \
      --local-dir /var/lib/vllm/models/my-private-model \
      --token "$HF_TOKEN"
  # Configure vLLM to use the downloaded model
  - |
    cat > /etc/vllm/vllm.env << 'ENVEOF'
    VLLM_MODEL=/var/lib/vllm/models/my-private-model
    VLLM_GPU_MEMORY_UTILIZATION=0.85
    VLLM_MAX_MODEL_LEN=2048
    ENVEOF
  - systemctl restart vllm
Runtime Model Upload
After a CVM is running (regardless of which approach was used to create it), you can deploy additional models over SSH.
Ollama
1. Transfer and Register
After enabling Buildroot SSH access for root with either SSH keys or the development-only OpenSSH drop-in, you can copy and register a model:
# Stage the files under a predictable top-level directory
mkdir -p /tmp/my-model
cp -R /path/to/model/files/. /tmp/my-model/
tar -czvf my-model.tar.gz -C /tmp my-model

# Copy into the CVM (port 6190 forwards to SSH port 22 inside the CVM)
scp -P 6190 my-model.tar.gz root@localhost:/var/lib/ollama/

# SSH into the CVM and register the model
ssh -p 6190 root@localhost
cd /var/lib/ollama
gunzip -c my-model.tar.gz | tar -xvf -

# The extracted model files now live under /var/lib/ollama/my-model/
cat > /tmp/Modelfile << 'EOF'
FROM /var/lib/ollama/my-model/weights.gguf
PARAMETER temperature 0.7
PARAMETER top_p 0.9
SYSTEM "You are a helpful assistant."
EOF

ollama create my-custom-model -f /tmp/Modelfile
For Ubuntu cloud-init CVMs, the default SSH user is ultraviolet (password: password). For Buildroot CVMs, the default user is root, but password SSH access must be explicitly enabled for local development. Prefer SSH keys for Buildroot images, or add a development-only OpenSSH drop-in that sets PermitRootLogin yes and PasswordAuthentication yes.
2. Verify
ollama listvLLM
1. Transfer and Configure
vLLM expects a HuggingFace-format model directory:
# Copy the model directory into the CVM
scp -r -P 6190 /path/to/my-hf-model/ root@localhost:/var/lib/vllm/models/

# SSH in and update the vLLM config to point to the new model
ssh -p 6190 root@localhost
sed -i 's|^VLLM_MODEL=.*|VLLM_MODEL=/var/lib/vllm/models/my-hf-model|' /etc/vllm/vllm.env

# Restart vLLM to load the new model
systemctl restart vllm
# or for SysV init:
/etc/init.d/S96vllm restart
2. Verify
curl http://localhost:8000/v1/modelsVerifying Model Availability
After deploying a custom model, verify it is accessible end-to-end through the Cube Agent. From the host:
# List available models (port 6193 forwards to the Cube Agent on port 7001 inside the CVM)
curl --cert /etc/cube/certs/client.crt \
  --key /etc/cube/certs/client.key \
  --cacert /etc/cube/certs/ca.pem \
  https://localhost:6193/v1/models

# Test a chat completion request
curl --cert /etc/cube/certs/client.crt \
  --key /etc/cube/certs/client.key \
  --cacert /etc/cube/certs/ca.pem \
  https://localhost:6193/v1/chat/completions \
  -H "Content-Type: application/json" \
  -d '{
    "model": "my-custom-model",
    "messages": [{"role": "user", "content": "Hello"}]
  }'
Buildroot images enable Attested TLS by default, so the Cube Agent on port 6193 expects HTTPS plus a client certificate. Use plain HTTP only if you have explicitly disabled Attested TLS in the HAL configuration.